Design-time Support
Both controls provide rich design-time support. They appear on the design surface as they do at runtime. Their properties can be edited using the normal Properties window. To define image areas, a custom collection editor is provided that lets you add, edit, and delete image areas as well as visually select the area's coordinate locations.
The Areas Collection Editor
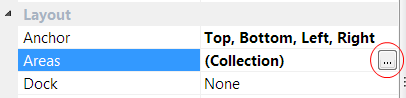
The designer is common to both controls. The only difference is in the properties available to the image areas themselves. To access the area designer, go to the Areas properties for the image map control and click the "..." button as indicated in the example below.
The image area collection editor is based on the standard Visual Studio collection editor. Members of the collection are shown in the list box on the left and properties for the selected object are shown on the right. The member descriptions are composed of the area's tool tip, shape type, and coordinates. Note that the order of the areas in the collection does not affect their tab order within the image map. The TabIndex property controls that.
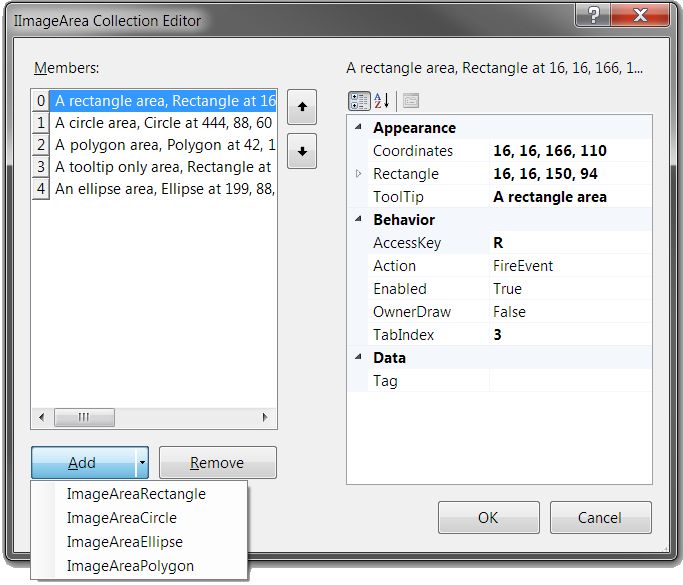
Click the Add button to add a rectangle image area. Click the down arrow button next to it (shown expanded in the example above) to choose the type of image area to add. Rectangle, Circle, and Polygon are available to both the web control and the Windows Forms control. Ellipse is only available to the Windows Forms control. Click the Remove button to delete an image area from the collection.
All image areas have a common set of properties with the exception of those that represent the underlying coordinates of the actual shape. The rectangle image area has a Rectangle property that lets you specify the top left corner and its width and height. The ellipse image area has an Ellipse property that lets you specify the top left corner and its width and height. The circle image area has CenterPoint and Radius properties that let you define its center point and radius. The polygon image area has a Points collection that lets you define the points in the polygon. The polygon's Points property uses another standard collection editor dialog to let you enter multiple points by hand.
Coordinates can also be entered by hand into the Coordinates property of each area type. The rectangle and ellipse coordinates specify the top left and bottom right points. The circle coordinates specify the center point and radius. The polygon coordinates specify pairs of X,Y coordinates that make up the polygon vertices.
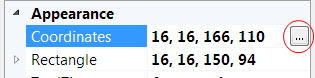
The easiest way by far to specify coordinates for any area is to use the visual coordinate selection tool. This is accessed by selecting the Coordinates property on any image area and clicking the "..." button as indicated in the example above. When clicked, the following dialog box appears that lets you specify the coordinates interactively by drawing on the image itself with the mouse.
For the web server control, you may first have to navigate into the folder that contains the image file so that the designer can load it. This only happens on first use. After that, the designer remembers the folder and will look there for the image first.
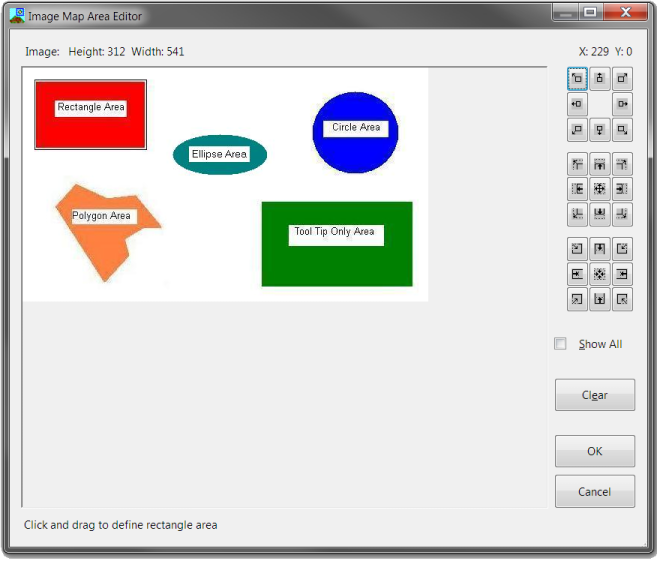
The image file name (web server control only), the image height, and the image width are displayed above the image in the top left corner of the dialog. The current X,Y coordinates of the mouse cursor are shown in the upper right corner. Instructions on how to select the image area are shown in the lower left corner.
When first opened, any existing coordinates will be used to draw the existing area on the image. For rectangles and ellipses, click and hold the left mouse button near an existing corner outside of the rectangle and you can drag the corner to a new position. For circles, clicking anywhere and dragging will expand the circle to the new size. For polygons, clicking points will extend the polygon by adding new vertices. The designer will not let you extend a shape outside the bounds of the image itself.
When creating a new polygon, you must click at least two points before the first line will appear. A minimum of three points must be clicked to form a basic polygon. Note that when drawn in the designer, the polygon will not be closed (the final point will not connect back to the first point). This will happen automatically at runtime. As such, you do not have to manually connect the polygon's end point to its starting point.
The button groups down the right side of the dialog allow you to make adjustments to the area's position and size. The top set of buttons allows you to move the entire image area in any direction. The middle set of buttons allows you to increase the size of any side of the area. The center button in the set will expand all sides of the area. The bottom set of buttons allows you to decrease the size of any side of the area. The center button in the set will shrink all sides of the area. The shrink and expand buttons are hidden for polygon areas as it is not possible to accurately shrink or expand the vertices of a polygon. Single click the buttons to make minor adjustments. Click and hold the buttons to repeatedly make the selected adjustment and release it to stop.
The Show All checkbox allows you to toggle the display of all other image areas on and off. This is most useful in owner drawn image maps that don't have an image defined. By showing all other image areas, it gives you reference points by which you can add or adjust the area being edited.
To clear any current area coordinates and start again, click the Clear button. To accept your changes to the coordinates, click the OK button. To discard your changes, click the Cancel button.
Image Area Coordinate Considerations
Image area coordinates are dependent upon the height and width of the image in effect at the time they are defined. If you subsequently change the image to a different file or change the image's width or height properties, you will most likely invalidate the coordinates for the image areas. At the very least, they probably will not surround the original area of the image. The image area collection will remain intact, but you will have to revisit each area and adjust its coordinates to work with the new image and its dimensions.
Note that changing the width or height of the Windows Forms image map control will not affect the image areas. The displayed image's width and height are independent of the Windows Forms control's width and height. The web server control's height and width are directly tied to the image's width and height and changes to them will affect the image area coordinates.
See Also
Other Resources
Welcome