Item File Templates
Item file templates are supplied for each of the common file types within a help file builder project. This topic covers how to add a file to a project as well as how to create and install your own custom item file templates for use from within Visual Studio.
Adding a File to the Project
To add a new file to a help file builder project, select the project node or the folder within which you want to add the new item and then select the Add New Item option from the Project main menu option or the Add | New Item option from the selected item's context menu. To add an existing item, use the Existing Item option from the project menu or context menu instead.
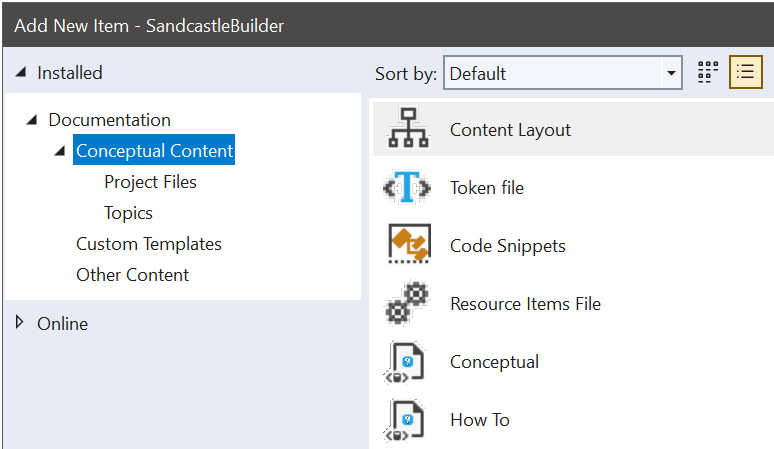
The Add New Item dialog box, shown above, groups the item templates into various categories. The parent category shows all item templates from its subcategories. Pick a subcategory to further filter the available selections. The Sort by combo box can be used to change the sort order of the items. The default sort order lists the most frequently used file types first followed by the lesser used file types within each subcategory. Once you have selected the file template, enter a name for it and click the Add button to add it to the project.
Creating Custom Item File Templates
Like the standalone GUI, Visual Studio supports custom item file templates for help file builder projects. However, they are created differently and are stored in a different location from the templates used by the standalone GUI. Follow these steps to create your own custom item file templates.
Create the template file. Name the file whatever you like and give it an appropriate extension. The content of the template file will be used as the default content for the file when it is added to a project. An example conceptual content template is shown below:
Example Template File: BlankTopic.aml<?xml version="1.0" encoding="utf-8"?> <topic id="$guid1$" revisionNumber="1"> <developerConceptualDocument xmlns="http://ddue.schemas.microsoft.com/authoring/2003/5" xmlns:xlink="http://www.w3.org/1999/xlink"> <introduction> <para>Required introduction</para> </introduction> <section address="Section1"> <title>Optional section title</title> <content> <para>Add one or more sections with content</para> </content> </section> <relatedTopics> <!-- Add related topics --> </relatedTopics> </developerConceptualDocument> </topic>In order for Visual Studio to know how to display and use your template file, you must create a VSTemplate file to accompany it. This is an XML file with a .vstemplate extension. The base filename should match the base filename of your template file (i.e. BlankTopic.vstemplate for the BlankTopic.aml template file). An example is shown below:
Example VSTemplate File: BlankTopic.vstemplate<VSTemplate Version="3.0.0" Type="Item" xmlns="http://schemas.microsoft.com/developer/vstemplate/2005"> <TemplateData> <!-- This is the name displayed for the template --> <Name>Blank Topic</Name> <!-- This is the description displayed for the template --> <Description>A blank conceptual topic</Description> <!-- This is the icon displayed for the template. This example uses an icon from the SHFB project package. If you want to add your own icon, use an Icon element as shown in the commented out example below instead. --> <Icon Package="{c997d569-ee8e-4947-a46f-9a0717ce39a0}" ID="407" /> <!-- <Icon>MyTemplateIcon.ico</Icon> --> <!-- This associates the template with the SHFB package --> <ProjectType>SHFBProject</ProjectType> <!-- The default filename to use --> <DefaultName>BlankTopic.aml</DefaultName> <!-- The sort order of the item. You can adjust this to have the template appear higher or lower in the list when using the default sort order. --> <SortOrder>10</SortOrder> <!-- Adding this element will cause the template to appear in parent categories if they are used. Adjust the number up if you have more than two parent categories. --> <NumberOfParentCategoriesToRollUp>2</NumberOfParentCategoriesToRollUp> </TemplateData> <TemplateContent> <!-- This defines the project item template file. The name should match the name of the item template you created. If it contains replaceable parameters such as "$guid1$", add the ReplaceParameters attribute and set it to "true". --> <ProjectItem ReplaceParameters="true">BlankTopic.aml</ProjectItem> </TemplateContent> </VSTemplate>For the Icon element, you can replace the ID shown in the example above with one of the following ID numbers to use one of the built-in file type icons. If you want to use your own icon, use an element like the commented out example to specify the icon filename. The icon file should be placed in the same folder as the template file and the VSTemplate file.
ID Number
Description
401
HTML file
402
Image file
403
Script file
404
Stylesheet
405
Text/general file
406
XML file
407
Conceptual content topic
408
Content layout file
409
Resource item file
410
Token file
411
Code snippets file
Create a .zip archive file containing the template file, the VSTemplate XML file, and the icon file if you added your own icon. Store the files in the archive without paths.
Create the folder [My Documents]\Visual Studio XXXX\Templates\ItemTemplates\SHFBProject\ where "[My Documents]" is the location of your personal documents folder and "XXXX" is the version of Visual Studio into which you want to add the templates. This is the root folder for your custom help file builder item template files.
To separate your custom templates from the standard item templates, create a subfolder such as .\Custom Templates beneath the root folder created in the prior step. This will make it easy to filter the list to your custom templates. Additional subfolders can be used to further sub-categorize the files as needed. For example, if you want to categorize your templates as conceptual content or other content, create a .\Conceptual Content and/or .\Other Content subfolder beneath the custom templates folder.
Place the archive file containing your template in the custom templates folder.
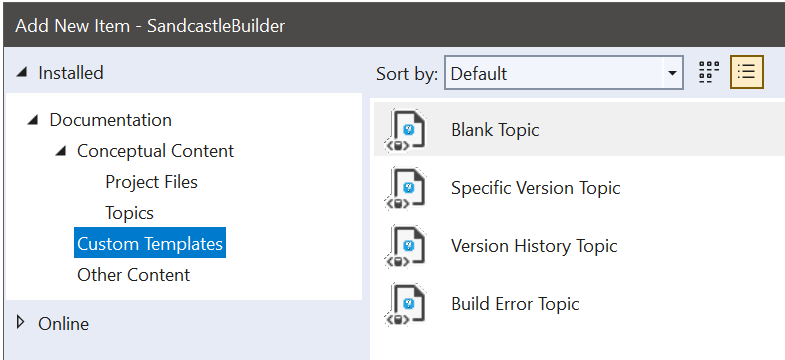
When you open the Add New Item dialog, you should now see your custom templates listed in the appropriate location. An example is shown below:
For more information about template files, see the Creating Project and Item Templates help topic.